Chuck's Weber Family Photo

Chuck's Weber Family Photo

Sunday, April 27, 2014

Wine Braised Beef And Peppers

I am a member of a very awesome and informative grilling/BBQ forum. The guys on there are great and they share some really good recipes. Years ago, one of the guys posted a recipe for something called "pepper stout beef." Oh man, that looked sooo good. Just the other day someone made a post about it. If people are still making the pepper stout beef, it must be good. I decided to give this a try. I changed a few things from the original recipe as it calls for an extra stout beer. I would have loved to use it, but my wife and kids probably wouldn't like it since my wife hates beer. Instead, I decided to use red wine as my braising liquid. I also left out the jalapeƱos so it is not too spicy for them. Here is the list of ingredients for my wine braised pepper beef:

-3-4 lb chuck roast
-kosher salt
-black pepper
-1 yellow bell pepper
-1 orange bell pepper
-1 red bell pepper
-1 large red onion
-6 cloves minced garlic
-1/4 cup Worcestershire sauce
-12 oz red wine


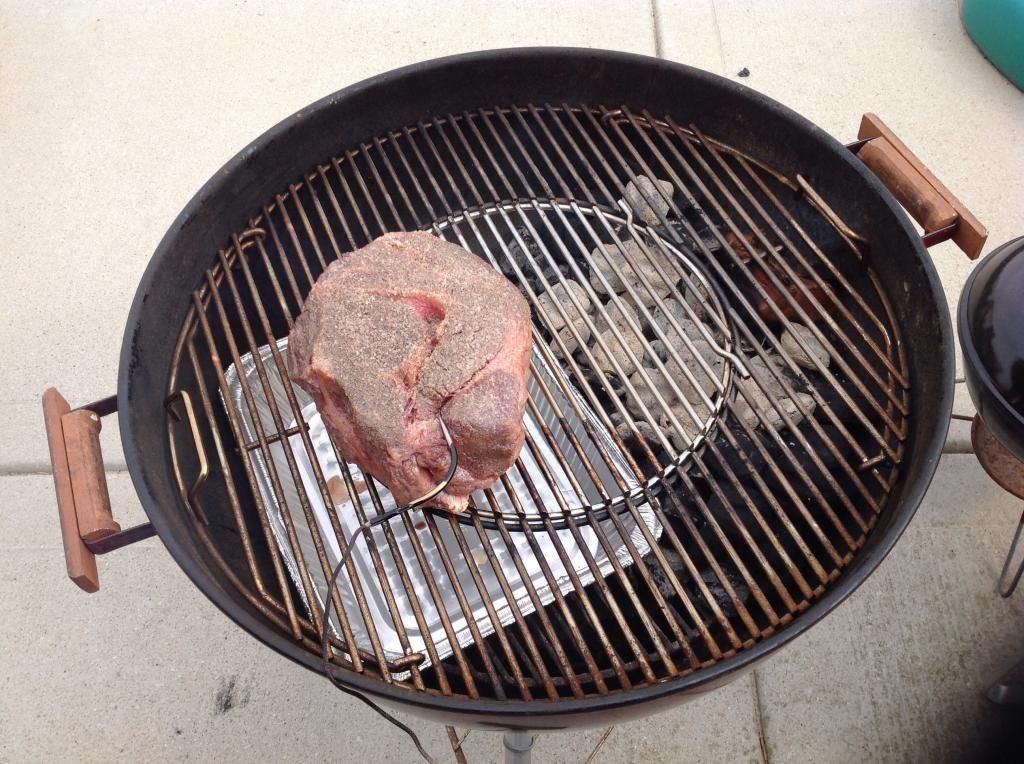
I heavily seasoned the chuck roast with kosher salt and black pepper on both sides.


This is a long cook so I set up my grill to cook indirectly. Instead of putting and lighting all coals in the chimney starter, I started with about 50 briquettes on the grill grate and 20 in the chimney starter.


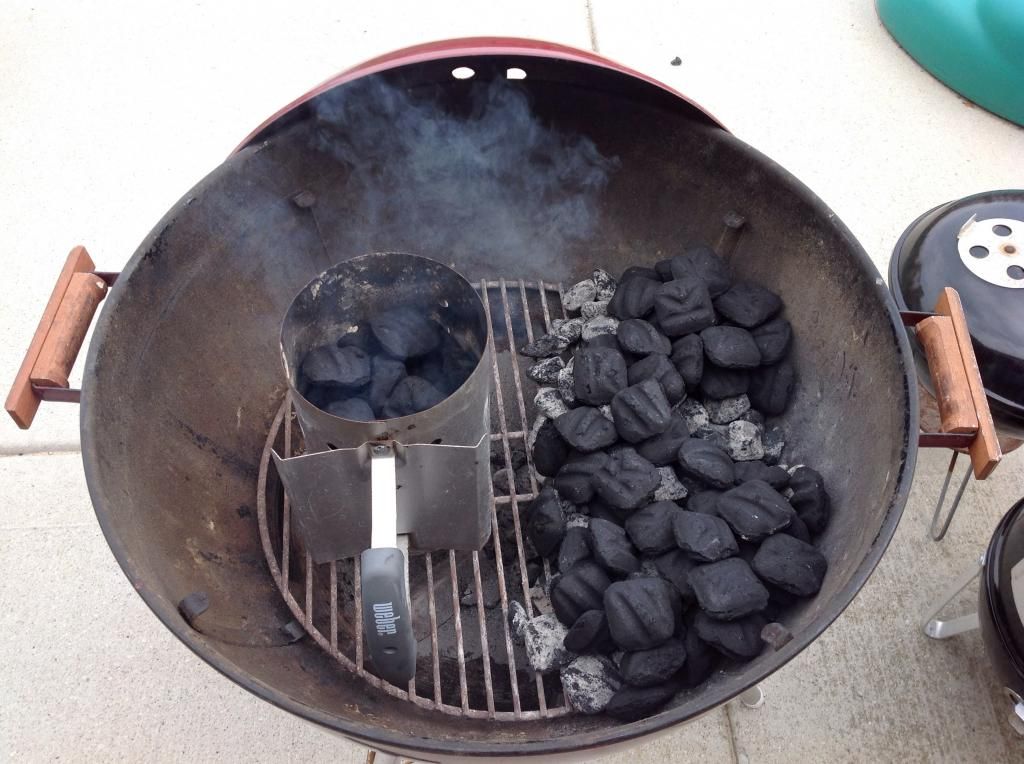
 I did this to keep the heat low. I only wanted the grill to be around 250 degrees for the first 3 hours. I also added a chunk of cherry wood to give the beef some smoke flavor.  I took the meat off a little bit after the 3 hour mark.


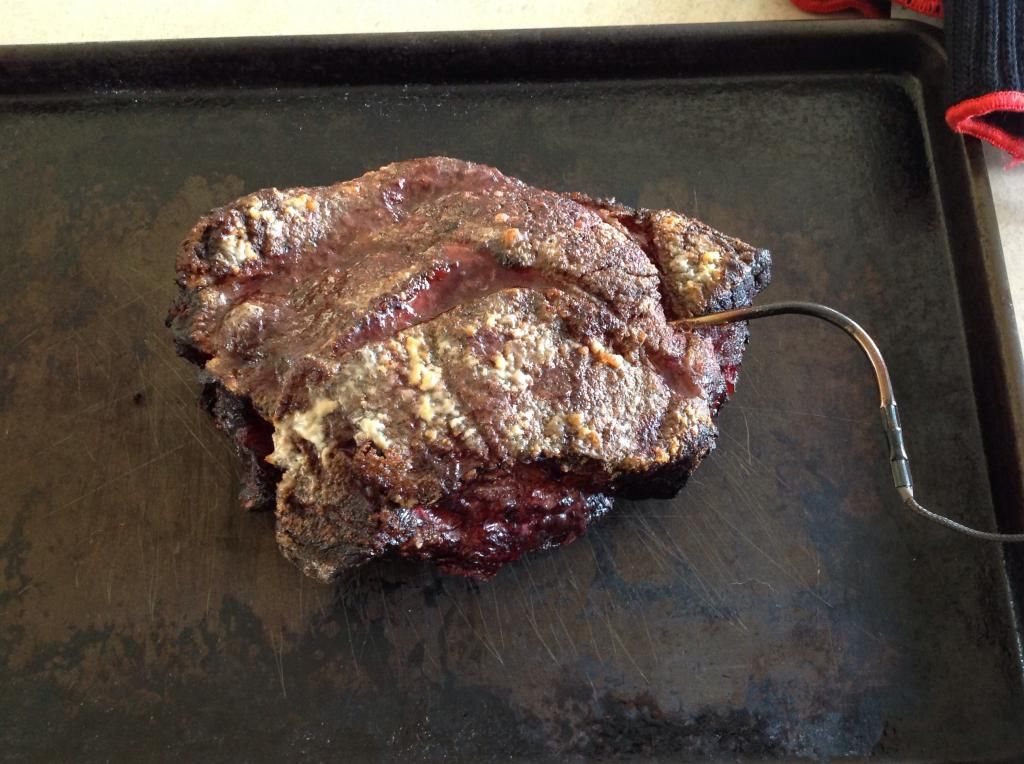
We had gone out for breakfast and when we got home, the roast was already at 168 degrees. Oops!  I wanted to pull it off at 165 degrees.  I diced up the yellow, orange and red peppers along with the red onion.  I also added the garlic, red wine and the Worcestershire sauce to a foil pan.


For the wine, I used 2011 M. Chapoutier Belleruche Cotes-Du-Rhone. It is a 60/40 blend of Grenache and Syrah. I put the roast on top of the veggies and sealed it tightly with foil. By this point I had already added more charcoal to the grill to bring up the temperature to 350 degrees.  I put the foil covered pan back on the grill once the grill temp hit 350 degrees. 


I let it ride for another 2 hours and 45 minutes. 


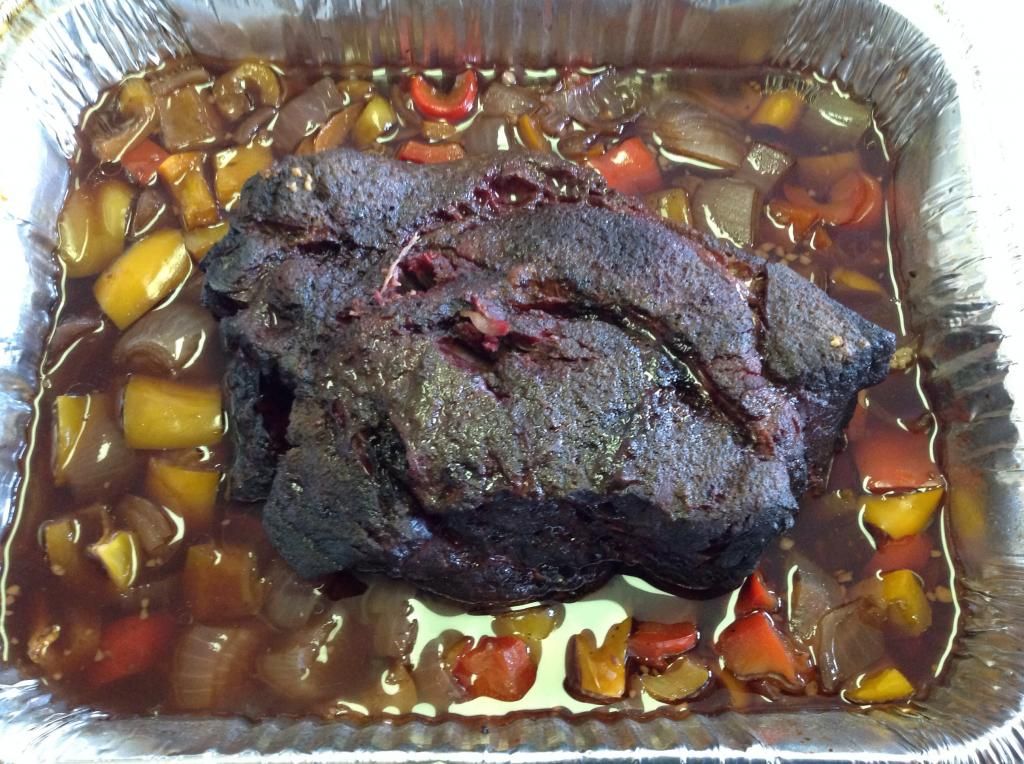
I pulled off the beef and did the fork test and it passed with flying colors.  The fork test is when you stick the fork into the beef and twist it like you are twisting spaghetti on a fork.  If the beef easily winds on to the fork, it is nice and tender.  I left the foil off of the beef and veggies and threw it back on the grill to cook down the juices.  After about an hour on the grill I pulled it off.  The juices didn't really cook down too much.  I decided to go ahead and pull it anyway.


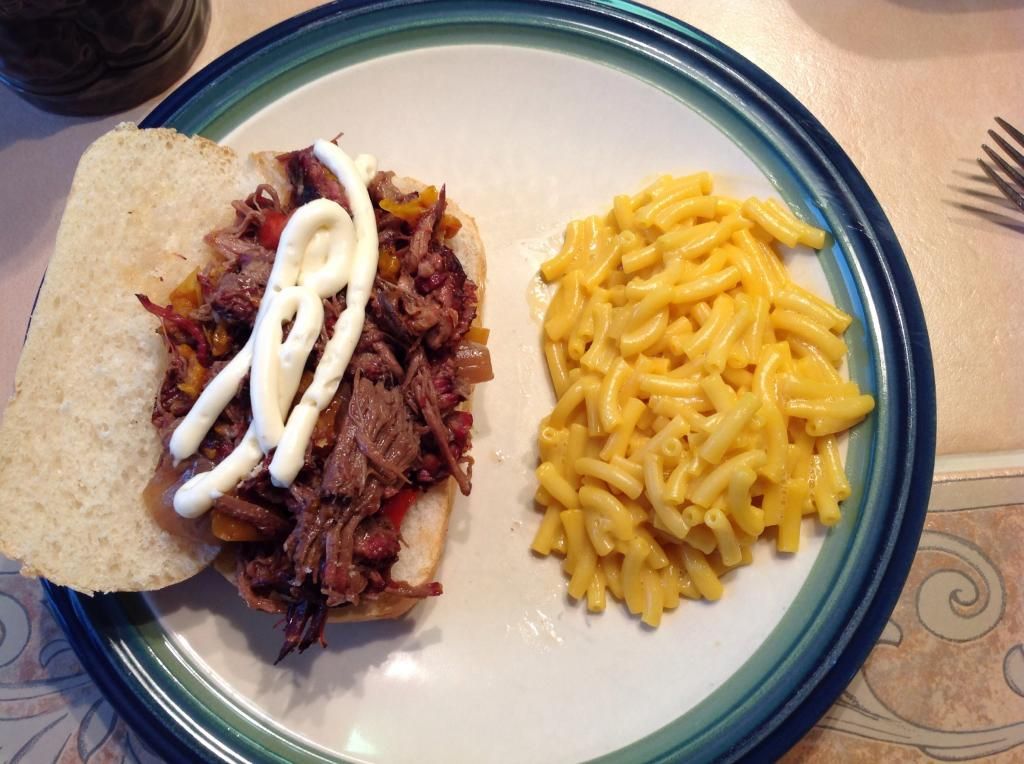
Here is the finished product served on a french roll with some horseradish and some mac and cheese.
 

Jenny and I liked it, the kids not so much.  All in all it was definitely worth the hype and I would make it again.  Thanks for looking!!!

Chuck


Saturday, April 26, 2014

Chuck's Grilling Tips

A buddy of mine thought I was THE grill master. He used call me every time he grilled to make sure he was doing things correctly.  I made up this list of tips to help him out.  He sent it along to a bunch of his friends and coworkers.  They found it to be pretty informational.  For my first blog, I decided to show you the list of tips I sent to him.  I went ahead and added some new things from the original list.  These tips are not 100%, but they will get you going.  I hope you learn some new information.  :)

-When using a gas grill, start it as specified in your grill’s instruction manual and turn all burners to high heat. Preheat for at least 10 minutes.
-When using charcoal, get the charcoal started by using a chimney starter. Load the charcoal in the top, place 3 crumpled up newspaper pages underneath. Light the newspaper. The charcoal should be ready to dump out after about 20-30 minutes when the top coals are ashed over.
-Dump the charcoal onto the charcoal grate and rearrange the coals using long handled tongs with a heat proof grill mitt. I like using the 3 zone method. I bank the coals higher towards the side of the grill and then less high as the coals go towards the middle of the grill. This way you have your high heat zone towards the front of the grill, your medium zone a little further back and your low zone a little further back still. When cooking indirectly, I also like to bank the coals all on one side as opposed to half and half on either side.
-Place the cooking grate on the grill, adjust your vents to the desired temperature you want and put the lid on the grill.
-When grill is preheated, clean grates from previous cook with a wire bristle brush.
-Adjust heat to the food you are going to grill. With gas grills, adjust the knobs for the burners. For charcoal grills adjust your vents. Open the vents more to increase air flow for a higher temperature or close them a little to decrease air flow for a lower temperature.
-Steaks and beef burgers, always grill over direct high heat.
-Pork chops and chicken breasts, grill over direct medium heat.
-Sausages, grill over direct medium low heat.
-Big pieces of meat like a pork loin, beef roast, whole chicken or whole turkey, grill over indirect heat.
-Rule of thumb is anything that is going to take longer than 20 minutes to grill needs to be done over indirect heat.
-I like to let the meat sit at room temperature for about 30 minutes prior to grilling. This way it doesn’t “shock” the meat from going straight from the fridge right onto the grill and cause uneven cooking.
-When cooking steaks, pork chops, burgers, and chicken breasts, flip only one time. DO NOT PRESS DOWN ON THE MEAT WHEN GRILLING AS IT CAUSES TASTY JUICE LOSS.
-When cooking sausages, be sure to turn them every 5 minutes to keep the outside from burning before the inside is cooked. Italian sausages and brats usually take about 20-25 minutes to grill.
-When cooking a meat indirectly, there is no need to flip as your grill will act like a convection oven. You only need to flip it if you are going to sear the meat. A sear is done on high heat for about 5 minutes per side.
-Make sure if you are using a charcoal grill to cook indirectly, that you position your lid vent opposite of where the coals are. This ensures the heat surrounds your meat and cooks it before going out through the lid vent. Also make sure you have a foil pan under your meat to catch the drippings so they don’t make a mess of your grill.
-Grill for the desired doneness of the meat as opposed to grilling by time. Every grill is different and the heat will be different. Weather also has an effect on the grill temperature.
-You can check doneness of the meat by using a meat thermometer that is inserted in the middle of the meat during certain times of the grilling process. As you grill more and more, you will become a pro at judging when a meat is done being grilled.
-You can also check the doneness of the meat by using the poke test. The more well done a meat is, the more firm it is going to feel. A good way to tell this is to use the meaty part of the palm of your hand between your thumb and forefinger. Touch your thumb to your forefinger and feel the meaty part of your palm, that is what the meat will feel like raw. Now touch your thumb and middle finger and that is rare. Your thumb to your ring finger is medium. Your thumb and your pinky is well done.
-After grilling, let your meat rest for about 5-10 minutes. This will allow the juices of the meat to redistribute throughout the meat and make it juicy.
-Enjoy your grilled meal!